Welcome to fiveotherwise

Trying to make the right choices in modern living.

Jelly Baby Wave Machine

Libby has been working her way through the Physics IGCSE course from Sam Martell and got to the section about waves. There are some excellent resources (see my other article on YouTube Videos) out there but nothing quite beats building a wave machine to explore the motion of waves directly. We went to the Bradford science fair a year or so ago and saw something there that we just had to have a got at building.

first wiggleIt’s basically a long piece of duct tape with bamboo skewers stuck to it and jelly babies stuck to  the skewers. When you suspend the tape and wiggle one of the skewers at one end it causes a transverse wave to propagate down the line. The waves will exhibit all the expected behaviours just like any wave does it’s just in a non-conventional medium! It’s perfect for playing with waves and you can eat the jelly babies afterwards if you want. It was pointed out that you don’t need to use jelly babies and the at something more permanent could be used and that is true but it’s not as engaging as making science edible, in my opinion. So if you fancy having a go, try following these instructions and take a look at the video we made on youtube (links are all below). So onwards…


First your going to need some basic equipment:

  1. A roll of duct tape long enough to do twice the length you’re planning.
  2. Bamboo skewers
  3. Jelly Babies (more than you think! as some get eaten)
  4. 2 metal rods or thick wood dowels for anchor points at each end.
  5. Tape measure
  6. Clamp stands or some way of suspending it at each end.
Jelly Baby Wave Machine

Our pile of kit

Our pile looks like this on the right.

Start by laying out the skewers on the tape, 5cm apart. Mark the middle of each stick and make sure you line up the middle of the stick with the middle of the tape and keep them perpendicular tot he tape.

Putting the sticks onto the tape

Putting the sticks onto the tape

Do it alongside a ruler and when you reach the end lay another stretch of duck tape over t he top of the skewers to keep them in place. We used a second role of tape and kept them both running continuously.

sticks on the tape  

Alex and Libby kept at the layout of sticks

two heads


centering the sticks

Cassie worked on marking the middle of the skewers. We anchored a metal bar at both ends

anchor pointAnd when we were done the whole tape was 4.5m long. We then rolled it up to make hanging easier.

rolling up the tape

Then using a couple of lab stands clamped to the kitchen bench and table…

first suspensionWe loaded the jelly babies. As we did so we noticed that  not all jelly babies are the same and this caused the sticks to start to hang lower on one side than the other so we went for colour pairs, putting only the same colour sweet on the same skewer. This seemed to balance things nicely.

spearing the jelly babiesOnce all the skewers had a jelly baby stuck on each end your done. Make sure it does not sag too much by pulling the ends out a bit.

first wiggleAnd give it its first wiggle by moving the end of a skewer at one on up and down to start a wave. The tension and weight of the set up will only want to go so fast, so as long as you’re not brutal with it, you can send a beautiful wave down the length and reflection at the other end will send it back.

Finally we made a video of the machine in action. It’s here on youtube.

Jelly Baby Wave Machine 

So I hope you have fun making your own and do email or leave comments letting us know how you got on.

Marmalade time!

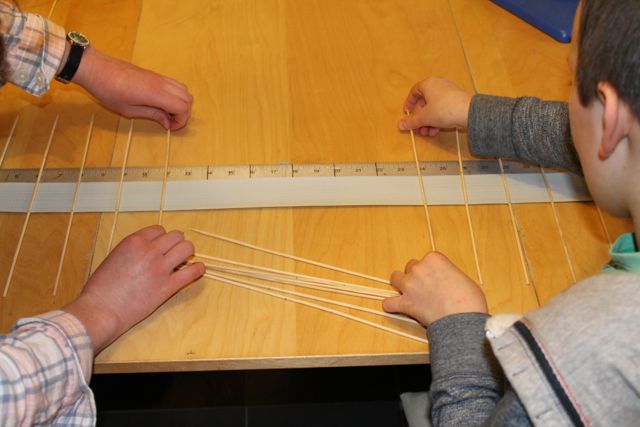
January means Seville Oranges which, of course, means Marmalade! Make sure you have a good sharp knife to cope with with the lengthy job of shredding the orange peel which is at the heart of a good marmalade. The job is always fiddly and best done with company, so Libby and I set to work. After much chopping and peeling and chatting all the peel, juice, pith and pips were simmering away into a suitable softness. If you’re after a recipe to try, give ours a go!

Seville Orange Marmalade

What you need

1kg Seville oranges

Juice from 2 lemons

4 pints water

2Kg sugar

What you do

Preparing the oranges
Cut the oranges in half and squeeze the juice into a large pan through a sieve to catch all the pips.
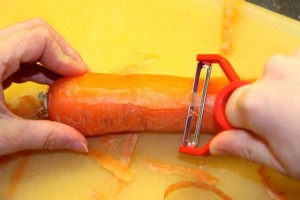
Using a spoon, scrape the pith and flesh from the orange peel and put to one side.
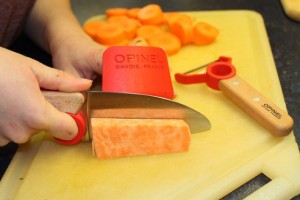
Carefully cut the peel into thin strips. The peel swells a bit, so remember to make them a little thinner, but it’s up to you how fine you like your marmalade peel.
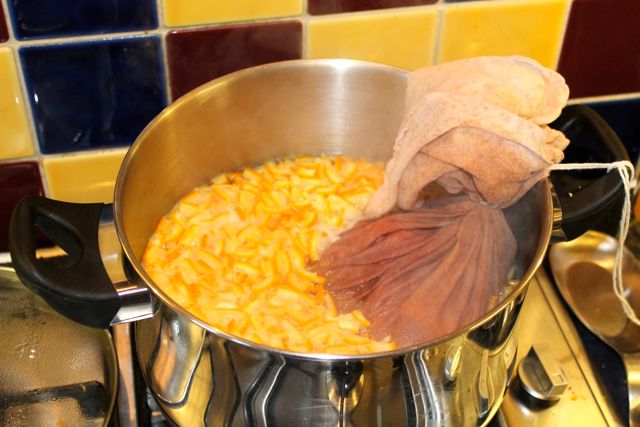
Place the peel in the pan with the fruit juices and water. Tie the reserved pith, flesh and pips in a large piece of muslin to make a bag, and put this in the water too. This will provide the pectin for your marmalade to set with.
Bring to the boil and simmer for an hour or two, until the peel has softened, and the liquid reduced by about a half.
Remove from the heat and squeeze the liquid from the muslin bag into the pan. You can get rid of the pips and stuff now, you should have enough pectin in your mix.

Jam Pan

Add the sugar to the pan and stir to dissolve.
When the sugar has dissolved, return the pan to the heat and bring to the boil.
Boil rapidly until the setting point is reached, then remove from the heat, skim any scum from the surface and leave for 15 minutes before putting in warm sterilised jars. Seal the jars and leave to cool completely

Once the marmalade is boiling rapidly, it looks quite frothy and exciting. The only thing to consider is the elusive “setting point”. This is normally reached once enough water has evaporated to allow the marmalade to reach 105degC so the pectin is activated and will make the jam set. I have gone for accuracy in the form of a Digital Candy Thermometer, with a handy pan clip and an alarm as the desired temperature is reached. You can also test the marmalade for setting by putting a little of it on a cold plate and seeing if it wrinkles when you push a finger through it. In fact it is always best to try this even if you think the temperature is there, as sometimes you need to get the jam or marmalade just a bit hotter, so I put a plate in the freezer to cool too.

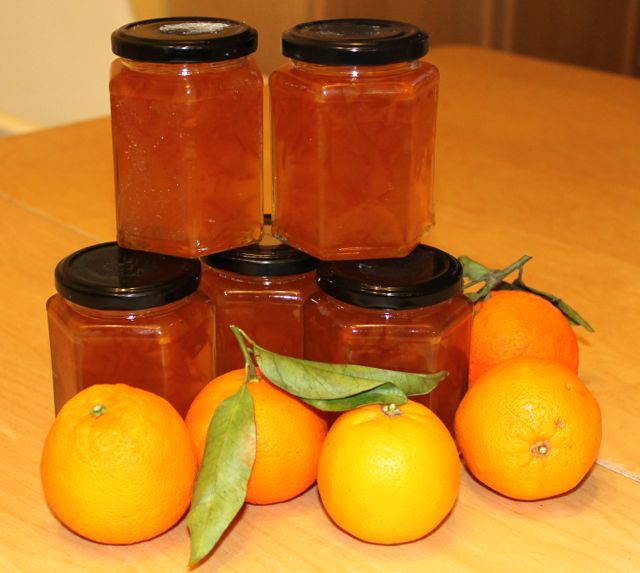
This combination has worked well for us, and we now have a years supply of yummy marmalade cooling on the counter.
marmalade making

Making marmalade in the fiveotherwise kitchen

Baking Bread

Fresh Baked Bread

Bread and Jam ready on the table

Making our own bread has become the standard over the last few years, once you get into homemade bread the alternatives always seem a bit lacking, but in a family of our size this is quite demanding, with whole 2lb loaves disappearing in a single lunch! So we have been looking out for a larger loaf tin for a while, and were pleased to find a nice long bread pan! (you can find it in our CookShop) As it is twice as long as a standard loaf tin we did a double loaf batch, as detailed in the recipe below. I wish I could share the smell of bread cooking with you, it is the most fabulous scent to fill your house with!

We have found the loaf to be a much better size for our family, and have even gone for double batches, making three loaves at once, which is as much dough as anyone can knead at a time!
One of the best bits of making bread at home is just how much you can get the kids involved. Jonathan has become quite adept at weighing out the ingredients and mixing it together in the bowl ready to be pulled together and kneaded. Kneading a whole loaf does take quite a lot of effort and may be beyond a small child, but bread rolls are perfect and can be shaped into interesting shapes.

What you need

  1. 1kg bread flour of your choice
  2. 2tspn salt
  3. 2tspn easy blend dried yeast
  4. 2tablespoons olive oil
  5. 600ml hand hot water

What you do

  1. Place the dry ingredients in a large mixing bowl and stir together.
  2. Make a well in the centre and pour in the oil and water, then stir in the flour with a broad knife, to make a dough.
  3. Tip the dough out onto a lightly floured surface and knead until smooth. Different flours can vary in absorbency, so you may need to add more flour as you knead.
  4. Oil the bowl and put the dough back into it, covering it with a cloth and leaving it in a warm place to rise. Again the rising will depend upon your choice of flour, with whole meal flour needing a bit longer than white.
  5. Once the dough has doubled in size, tip it back out of the bowl and knead it gently to even it out, then shape it to fit your pan. This recipe fills the kaiser 32cm pan, but could be cut in half to make two 2lb standard loaves.
  6. Oil and flour your bread pans. Roll your shaped dough in flour to coat it and put it in the pan.
  7. Cover and leave it to rise again until it has started to dome out of the loaf pan. Make a couple of shallow cuts diagonally across the top of the loaf before placing in a preheated oven at 200degC for 35mins, or until well risen and golden. Test if it is done by tipping it out of the pan and tapping the bottom. When ready, bread sounds quite hollow, and it is best to cook a little longer than to end up stodgy in the middle.
  8. Leave the bread to cool before slicing.

Make it your own

I like to use a mix of flours, with malted or seeded flours for extra flavour and white to give it a bit of lift. It is fun to experiment. Or you could divide a half recipe into 12 and kneed them into individual rolls and then shape them into something more interesting. Add some poppy seeds or sunflower seeds for added interest.

Bread Knots, Rolls and Hedgehogs

Bread Knots, Rolls and Hedgehogs

IGCSE Physics revision videos

I just found this set of video’s on YouTube. The channel seems to cover both Edexcel and Cambridge IGCSE physics. Libby too a loo at he waves video today and said it really helped. Often it’s a case of having something explained by someone else who inevitably does it in a different manner or uses different phrases. This chaps bio says he is a Physics Teacher at Sherborne School, Dorset, UK. Anyway, hope it helps with the revision, teaching etc.

Ben Ryder – YouTube.

Children and Sharp things.

Knife and Peeler

Knife and Peeler

It’s always been the case that our kids want to help out with  the cooking and recently Alex has been wanting to help chop up anything. This leaves us with the dilemma of letting him loose with a sharp knife and having to watch him like a hawk, thus preventing you from doing anything else OR say “No Way Jose” and loose his interest and keenness to be involved.

So thanks to Christmas, Alex has been enjoying helping in the kitchen using a special children’s knife set, from Opinel called Le Petit Chef. The set includes knife, peeler and a great device for covering fingers to protect them. In the handles there is a circle for the child’s forefinger to go in, which brilliantly leads the child to a safe and effective grip. As the supervising adult this means you can relax a bit! Everything is child sized but still with the blades sharp enough to properly cut hard vegetables. So yesterday Alex was again in charge of chopping vegetables for soup. I took charge of only the onion, whilst he got quite professional with carrots, celery, courgette and sweet potato. He has also been quite a whizz doing the vegetables over the festivities. It is great to get him involved, and he says, “This knife set is very, very good. Now I can do all the cooking!”.

Take a look at it in action in the photos below so you can see how they work and if you want to know more follow this link to take a look at in in the fiveotherwise Cook shop.

Peeler Knife

Many people say that you should never give a child a sharp knife, if that’s the case then when do they learn how to use on properly and safely? The key to teaching them knife skills is, as always, carefully supervised use of the proper tool. Show the child how to use the knife and guide their hands when they are first learning. Make sure they keep their fingers out of the way of the blade as it cuts, the finger ring and guard help with that. Never allow them to run their fingers over the blade or put the blade on anything that they are not trying to chop up. Always ensure the knife is used on an appropriate cutting surface and that the knife never leaves the surface and never goes near faces. You know your child’s ability better than anyone, so only proceed if your are sure; their safety is your responsibility. Also, it’s probably worth starting with the peeler as this is easier to use, and then you can demonstrate chopping whilst working together on a meal.

Leek, Potato & Spinach Frittata

This weekend we tried out a rather good recipe for a frittata that we’ve wanted to try for while, it’s a bit like the one at www.food.com. The recipe first requires you to fry the potato, leek and onion on the hob before adding the spinach, whisked egg and then putting the cheese topped dish into the oven to cook. It needs the ingredients to be cooked together in the same pan that then goes in the oven for 10 mins. You can use a frying pan with an oven proof handle but for feeding six this gets quite big. So using Tart Tatin, which is designed to go from hob to oven, is really neat. The layering made it a rather attractive lunch. See what you think.

fiveotherwise.com

Spinach and Leek Fritatta in the fiveotherwise.com kitchen

Mincemeat Streusel

Inspired by the Great British Bake Off Christmas Special, I had a go at Mary Berry’s mincemeat streusel as a tray bake using a Gobel Tarte Maison, which has a fancy edge and a loose bottom to help get the bake out! I personally have no idea how Mary got hers out of the tin, and she wasn’t giving away any secrets.
I didn’t follow the recipe from the website perfectly, as I had plenty of homemade mincemeat already. I was also lacking in semolina for the streusel topping, so I substituted ground almonds to try and give a coarse texture and a flavour that is quite complementary to mincemeat.
The pastry was super thin, the topping grated well and cooked to a crunchy golden. Once cooled in the tin, the loose bottom allowed the streusel to slide out beautifully, keeping the fluted edge wonderfully crisp. The result was a delightful improvement on traditional mince pies, which we shall be definitely repeating for Christmas.

20131223-210943.jpg

Halloween and Pumpkins

Well Halloween is here again and the kids want to go around the neighborhood trick or treating as usual. I seem to remember that before that we used to go around with a hollowed out turnip and knock on the doors of people we knew. Now it is pumpkins, costumes and every door that has a light on. It’s moved on and I think got a bit better, though somewhat commercialised in parts. We try to stay away from that and stick to made up costumes and hollowed out pumpkins where possible. We bought 4 small ones this year so everyone could have a go, we also got some really good sharp knives that did an excellent job of cutting through what has always surprised me as very tough skin.

Cassie started off by cutting out the top and marking up the front face then removing some of the flesh with a spoon.

starting off carving

Lid off and flesh removed

Then she began carving the face out with a good sharp knife. Which makes it easier. Best to have an adult do this part if your kids are too young.

pumpkin carving

Cassie carving her pumpkin

After Cassie the other kids did theirs and after much clearing up the finished four pumpkins were ready. (Sam is too small yet to have his own!)

four pumpkins done

The finished ensemble


Well the evening went very well, with kids all over the street and too many sweets being given out. The only problem that remained was what to do with the leftover pumpkin. Well this year, as always we try to use it up. It’s never easy as it’s not been favourite, but we tried a simple roast pumpkin and stock soup accompanied by a pumpkin and rosemary soda bread. It turned out to be a huge hit with everyone.

roasting-seeds

Roasting Pumpkin seeds and adding salt to flavour


Pumpkin and Rosemary soup.

Pumpkin and Rosemary soup.


Well we still have loads of leftovers to use up so I expect we’ll be trying other recipes in the very near future. I hope you enjoyed your evening.

Liquid Land: legacies of oil and power

For my Bronze Art AwardsI had to make a review about an art exhibit, and if you go to this URL you will find it!

http://www.fiveotherwise.com/libbyart/Libbys_Arts_Award/Liquid_Land.html

have fun reading it!

If you have the time please answer these questions and post up the answers. (Click the title above to take you to  this posts page and the comment box.)

1. How does the review make you feel about the people in the pictures? Do they make you feel sorry for them or sad that they live there? Or do they make you feel happy they got back to where they used to live?

2. What would you have done if you were in the Ukrainian women’s position?

3. How do you feel about her idea of using her father’s butterfly pictures in her “Liquid Land”?

4. Would you go and see the exhibit?

Thank you for your help!

Shortcuts & Digressions

Shortcuts & digressions is a collection of contemporary sculptures which contain with in them selves a story, mood or sense of being felt by the artist.

We went round Norwich castle were the exhibit was being shown while we were on holiday and I thought I would have a look. I especially liked:

  • You Can’t Touch This by John Frankland

A wall of laminated Polythene stretched across wooden frames. It is shiny, giving a modern feel. Like an office building in a city, with glass windows all the way up it. And yet the yellowy colour is more like a warehouse. Maybe it is a lift into a space ship? Can you see through it on the other side? the intrigues, like these, about it and what it is make you want to open the inset door like frames. Or even just touch it. To me it shows the future and the doors we may pass through.

  • Untitled Stile (teenaged version) by Adam Chodzko

Bright blue gloss paint on a wooden stile. There are dents in the wood as if it has seen ware before, and the paint has given it a new lease of life, made a new. Though the stile then seems strange, urging you to go over, like one of life’s little obstacles. It reminds me of walks in the dales with my family, but also of passing from one place to another as with a real stile you must pass over, but you may not see the place your in again.

Untitled-stile-S&D-(AA)-

  • Climbing Around My Room by Lucy Gunning

A video of a journey, it starts and ends in exactly the same place and is on a continuous loop. It focuses on a young woman in a bright red dress as she climbs around a room empty save the few furnishing on which she climbs. The footage shows a journey, but also presents the childish nature in which we see things from a point of view were there are no risks present in our minds. It is the journey of a childish figure in the small world of a child. I like the concept of this piece, but at the time I didn’t really understand what it was trying to say.

  • Ego Geometria Sum VIII: The Horse Aged 11 by Helen Chadwick

A wooden box with pictures of ancient crumbling pillars on its sloped sides. It looks like a small gymnastics horsebox or a child’s desk. The top has a picture of a child’s fingers resting as if to open a toy box, and pictures of stationary like it is a desk. Its colours, that of old photos, and the broken pillars on its side, and the other images, present a sad sort of remembrance of childhood, when things were new and unweather beaten. Over all it had a rather sad feel to it.

I Liked seeing a different style of art, as I have not seen a lot of contempory sculpture before. There was a written explanation, often quite lengthy, for each of the sculptures telling you what the artist was meaning, however I could not always see or feel it, so they just seemed odd.

I think I have learnt that often, everyday objects can present a completely new meaning if removed from their ordinary place and set in front of you, making you think.

Results Day -round one!

So it is a HUGE CONGRATULATIONS to Cassie after her exam results came through yesterday.

A* in Maths, A* in Biology and A in Chemistry!!!

Well done! We know you deserved it because we know how much work you did to become comfortable enough with the subjects to be confident at answering those exam questions.
It is also, of course, really nice to see that working otherwise than in school can give you just as good results as the more usual school route. Basically our Home Education is working!!!

I also want to say that the school we are doing the exams through has been great, with the exams officer emailing Cassie’s results to us at 7:10 am, so we had no long wait to build up nervousness! I have already thanked her, and we shall be contacting them in September to arrange round two.

That is another point, of course. This is just round one for Cassie, and the first round for all of us as a family. Cassie has already started her English Language and English Literature courses, this time a correspondence course with Catherine Mooney, and is beginning to study physics. I think her achievements so far stand her in good stead, she knows what it takes to get what she wants. Libby is now looking at how much of her maths book is left to finish before she can sit the exams too. So, onwards and upwards for us all!!!

After the rain…

The rain has thoroughly soaked the garden and totally filled both of our water butts, so no worries anymore about draughts! Now we just have to get out there and get tidying up the plants, harvesting fruit and maybe sowing a bit for whatever is next.
At the moment there is a constant flow of courgettes, potatoes whenever we need them and raspberries, red currants and gooseberries in need of picking. The peas, lettuce and carrots are still coming, although we are passed the best. I should be sowing more lettuces, but there is always something else happening, so they will have to wait!
It is fun having potatoes in the garden, although they only supply us for a few weeks of the year. I think it is one of those important lessons for the kids on where food comes from, and there is always excitement to see how many, and how big, the potatoes are lurking under the plants. For the past few years we have taken part in the Potato Council scheme for schools and home educators of primary age kids. Once you register, they will send you grow packs of two types of potato to try, with full instructions. All you need is a bit of space, sun and some compost.

Facebook here we come

We’re on Facebook so you should also be able to follow us there too. Just click the Facebook follow link at the top of the page or visit us at http://www.facebook.com/fiveotherwise like us and follow us. Make sure to commentt an like our posts.

Whose kitchen is it anyway?

Because I have injured my knee, Neale has taken over the kitchen this week, with a little help from Libby. I think he has enjoyed it, especially making food for baby Sam, which is surprisingly satisfying. He has coached Libby through making a lamb curry and spaghetti bolognese, and tried an old recipe for Sam of a Moroccan style lamb, which has apricots and spices in it, and which went down a storm. They are managing very well. Neale is a good cook, when I let him have a go, but I am looking forward to being back in charge!

Home Education when ill!

What a week! Last weekend I injured my knee, and although at first I muddled through I ended up having to rest it pretty constantly. This is the sort of thing that really effects home education. Being ill in a normal job just means that you stay at home, but when you are supposed to be guiding and organising kids work there is a certain feeling that when you stop, they stop! I tell myself that we will catch up with things, and that learning is not a rigidly linear event, but I usually do badly at convincing myself. All in all, I always feel guilty when I get ill.
Luckily we have Neale at home at the moment, so he was able to do a lot of the stuff. Plus it is “not school holidays” so our work schedule is cut down. And the girls are working much more at their own rate, with only a few pointed questions getting them involved in their courses. I am still desperate to get back to it, I am missing the cooking and garden too.

Mob Grinders

In minecraft you can build mob grinders. This post will tell you why you need them and how to build them. You need mob grinders to get resources without having to risk your life. These are the things you can get from them (I am not doing passive mobs, like cows and chickens):

  1.  Skeleton
    1. Arrows for firing.
    2. Bones for bone meal.
  2. Creeper
    1. Gunpowder for TNT
  3. Spider
    1. String for making bows and fishing rods
  4. Zombie
    1. Rotten flesh

For more info go to the minecraft wiki drops page.

There are many ways to build mob grinders but I’m only telling you one. Probably the most simple is a hole in the ground 30 blocks deep. It can be as big as you like, I use a 3 by 3 hole. Dig the hole and place signs around the inside edge. At the bottom place two layers of hoppers with chest underneath. Finally another hole 1 block wide and ladders down the edge, so you can get to the bottom without killing your self. Don’t forget a trap door at the top to keep the mobs out. Make it so that you can go underneath the chests and your done. I hope you enjoy building this one and lots more, bye for now.

Here are some pictures to help you out.

From above:

2013-07-04_13.02.19


The trapdoor:

2013-07-04_13.02.06

Open trap door:

2013-07-04_13.01.44


The hoppers:

2013-07-04_13.02.31


The chests:

2013-07-04_13.03.10


X-ray view:

2013-07-04_13.24.03


Have Fun! and stay safe!


School Holidays Approach

I’ll mention the holidays a few times I am sure, but let me start out by saying that generally we do not take school holidays from our HE. Partly this is because we always holiday during term-time when it is quieter and cheaper, and easier for Neale to book time off work. I also feel that we do not study intensely enough to require a huge break, more that study is gentle and continuous discovery and practice.
In spite of this we are affected by the holidays because all of a sudden the neighbourhood is full of playing kids, calling at all hours, and a lot of our usual activities are on hold. So a happy medium has to be reached, which usually means I get work sessions out of the kids in the morning, but little else! This year I am hoping Cassie at least will work through the holidays as she has quite a lot to do in the next year, and with the art awards to finish by the end of August, Libby will have a goal to hit too.
So, whilst we have not been throwing ourselves wholeheartedly into study we have been ticking over nicely, in spite of heat. Cassie has got stuck into her English language course from Catherine Mooney and is almost done with her art award work. She did a Manga Art workshop for the other kids at our regular monthly HE get together on Friday, which went down very well and now has to be documented as the ” passing on a skill” section of the award.
Libby has been sticking to her effort to spend an hour a day on physics, as well as her maths sessions, and I have managed to keep the boys attention most mornings too! So, all in all, the best you can hope for with the heat and the impending school holiday looming.
Childhood does have to be enjoyed though, and weather like this is rare enough to need special recognition, so we all snuck off to Bolton Abbey on Thursday afternoon for a couple of hours playing in the river Wharfe, while its hot and quiet!

fiveotherwise.com is a participant in the Amazon EU Associates Programme, an affiliate advertising programme designed to provide a means for sites to earn advertising fees by advertising and linking to Amazon.co.uk and Javari.co.uk.